DIY home improvement ideas are the perfect way to enhance your living space without breaking the bank.
Whether you’re looking to spruce up your interiors or tackle outdoor projects, these ideas will inspire you to get creative.
Top 10 DIY Home Improvement Projects
Here are the top 10 DIY home improvement projects that you can tackle this weekend to enhance your space.
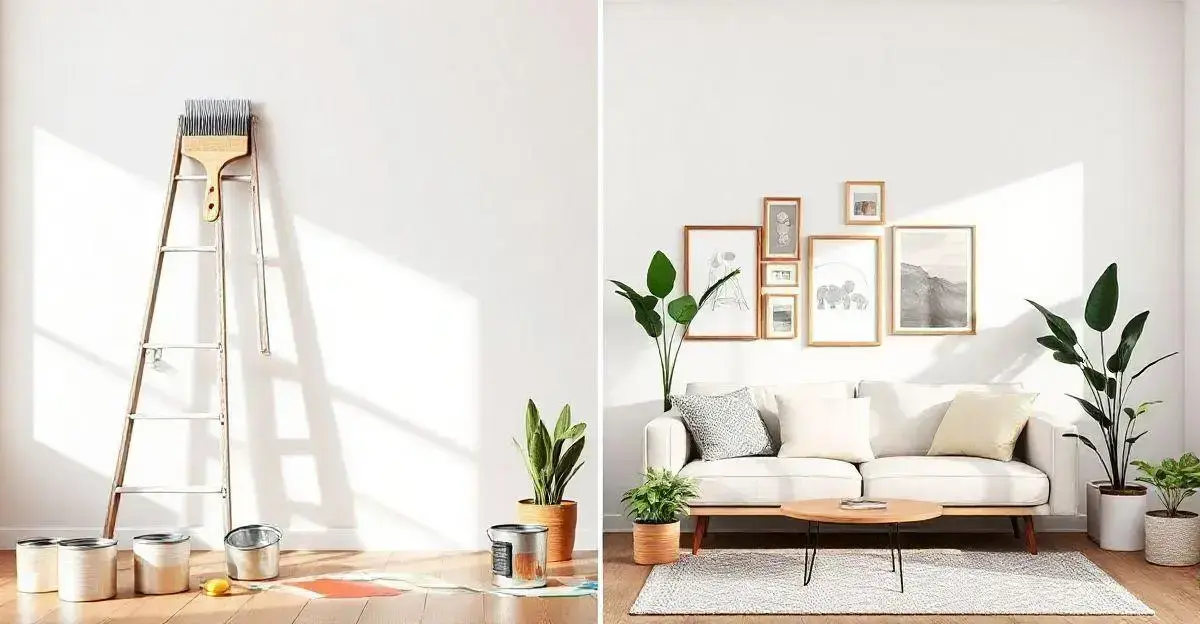
1. Paint a Room: A fresh coat of paint can dramatically change the look of any room. Choose a colour that suits your style and mood, and consider using accent walls to add interest.
2. Install Shelving: Create more storage and display space by installing simple shelves. Use floating shelves for a modern touch, or build custom bookshelves to showcase your collections.
3. Update Light Fixtures: Changing out old light fixtures can instantly upgrade your home’s feel. Look for unique designs that complement your decor style.
4. Refinish Cabinets: If your kitchen or bathroom cabinets are looking worn, consider refinishing them. Sanding and painting or staining can breathe new life into them.
5. Create a Garden: Start planting flowers, vegetables, or herbs in your yard or balcony. Not only does this beautify your space, but it also provides fresh produce.
6. Install a New Backsplash: Adding a backsplash in your kitchen can enhance aesthetics and protect walls from spills. Use tiles, stainless steel, or even peel-and-stick options for an easy upgrade.
7. Build a Fire Pit: Create a cozy outdoor space for gatherings by building a simple fire pit using bricks or stones. It’s perfect for evenings spent with friends and family.
8. Upgrade Flooring: If your floor is outdated, consider DIY options like vinyl planks or laminate. These materials are simple to install and can transform any room.
9. Create a Gallery Wall: Showcase your favourite photos and artwork by creating a gallery wall. Mix and match frames for a fun and eclectic look.
10. Add Smart Home Devices: Upgrade your home by installing smart thermostats, lights, or security cameras. These devices not only improve convenience but can also save you money in the long run.
Budget-Friendly Upgrades That Make a Difference

Budget-friendly upgrades are essential for homeowners seeking to enhance their spaces without spending a fortune. Here are some ideas that can transform your home effectively.
1. Paint Cabinets: A fresh coat of paint on your kitchen cabinets can make them look new. Choose a trendy colour that matches your style.
2. Update Fixtures: Swapping out old light fixtures and faucets can elevate the overall look of your home. Look for styles that complement your decor.
3. Re-purpose Furniture: Instead of buying new, consider re-purposing what you already have. A little paint or new hardware can give old furniture a new life.
4. Install Peel-and-Stick Wallpaper: This is a great way to add character to your rooms without the commitment of traditional wallpaper. It’s easy to apply and remove!
5. Create an Outdoor Living Space: Add some outdoor furniture and lights to make your patio or garden a more inviting place. Use affordable chairs and tables to create a suitable setting.
6. Use Area Rugs: A new area rug can tie a room together and add warmth. Look for budget-friendly options to enhance your interior.
7. DIY Artwork: Create your own artwork or wall decor. This not only saves money but also gives a personal touch to your home.
8. Enhance Curb Appeal: Simple landscaping changes like flower beds or potted plants can make your home more inviting.
9. Organise Spaces: Use storage boxes and baskets to organise your belongings. A tidy space feels bigger and more welcoming.
10. Energy Efficient Upgrades: Consider switching to energy-efficient lightbulbs or appliances. They save money and are good for the environment.
Essential Tools for Your DIY Toolbox
Having the right tools in your DIY toolbox is crucial for tackling any home improvement project efficiently. Here’s a list of essential tools that every DIY enthusiast should own.
1. Hammer: This is one of the most basic tools that every toolbox needs. A hammer is useful for driving nails into wood, hanging pictures, and simple repairs.
2. Screwdriver Set: A set of screwdrivers, both flathead and Phillips, is crucial for assembling furniture and tightening mechanisms around the house.
3. Measuring Tape: Accurate measurements are key to successful DIY projects. A measuring tape allows you to measure distances and dimensions easily.
4. Level: To ensure your shelves are straight and your pictures are aligned, a level is an essential tool that provides accurate horizontal and vertical readings.
5. Utility Knife: A utility knife is adaptable for many tasks, from opening packages to trimming materials. It’s a versatile tool that’s always handy.
6. Pliers: Pliers are excellent for gripping, twisting, and cutting wire or other materials, making them an important addition to your toolbox.
7. Power Drill: A power drill is a must-have for drilling holes and driving screws quickly and efficiently, saving you time and effort.
8. Safety Gear: Don’t forget about safety! Always include goggles and gloves in your toolbox to protect yourself while working on projects.
9. Adjustable Wrench: This tool is perfect for plumbing tasks, allowing you to grip several sizes of nuts and bolts with ease.
10. Stud Finder: A stud finder makes it easier to locate wooden or metal studs inside walls, helping you securely mount shelves, frames, and other heavy items.
Step-by-Step Guide to Painting Your Home

Painting your home can seem daunting, but with the right steps, it becomes a manageable task. Here’s a step-by-step guide to help you achieve a professional-looking paint job.
1. Gather Supplies: Before you start, collect all necessary supplies. You will need paint, brushes, rollers, painter’s tape, drop cloths, and a paint tray.
2. Choose the Right Paint: Selecting the right paint is essential. For walls, choose a quality latex paint. For trim, consider using oil-based paint for durability.
3. Prepare the Room: Remove furniture or cover it with drop cloths to protect it from paint splatters. Tape around windows, doors, and baseboards using painter’s tape.
4. Clean the Walls: Dust and clean the walls to ensure proper paint adhesion. Use a mild detergent and water solution for stubborn stains.
5. Prime the Walls: If you are making a significant colour change or painting on new drywall, apply a primer first. This helps the paint stick better and improves the final colour.
6. Start Painting: Begin with the edges using a brush, especially in corners and around trim. Once those areas are done, use a roller for larger sections, rolling from top to bottom.
7. Apply Additional Coats: Depending on the colour and finish, you may need to apply one or two more coats of paint. Allow sufficient drying time between coats.
8. Clean Up: Once done, carefully remove the painter’s tape while the paint is still slightly wet to avoid peeling. Clean brushes and rollers with warm soapy water.
9. Enjoy Your Freshly Painted Home: Step back and admire your work. You’ve transformed your space with a fresh coat of paint!
Creative Storage Solutions for Small Spaces
Creative storage solutions are essential for maximising space in small areas. Here are some ideas to help you organise efficiently.
1. Under-Bed Storage: Use bins or drawers that fit under your bed to store seasonal clothes or extra linens. This makes use of forgotten space.
2. Wall-Mounted Shelves: Install shelves on walls to keep items off the floor. Use them for books, decor, or even kitchen supplies.
3. Multi-Functional Furniture: Opt for furniture that serves multiple purposes, like a coffee table with storage or a sofa bed. These save space and add functionality.
4. Over-the-Door Organisers: Utilise the back of doors by adding over-the-door organisers for shoes, accessories, or cleaning supplies. This keeps items accessible and off the floor.
5. Vertical Storage Solutions: Use tall bookcases or stackable bins to make the most of vertical space. This draws the eye upward and creates room for more items.
6. Hanging Baskets: Attach hanging baskets to walls or ceilings for storing fruits, vegetables, or crafts. This adds a decorative touch while keeping things organised.
7. Magnetic Strips: Install magnetic strips in kitchens or workshops to hold metal tools or utensils. This makes items easy to grab and saves drawer space.
8. Closet Organisers: Use tiered hangers or shelf dividers in closets to maximise storage. Organisers help use every inch effectively.
9. Under-Sink Solutions: Add racks or stackable bins under your sink for cleaning supplies or kitchen items, utilising the otherwise wasted space.
10. DIY Storage Boxes: Get creative and make your own storage boxes using recycled materials. Decorate them to match your decor while keeping clutter at bay.
How to Choose the Right Materials for Your Projects

Choosing the right materials for your DIY projects is crucial to achieving successful outcomes. Here are some key considerations to guide your selections.
1. Understand Your Project: Before selecting materials, clarify the purpose of your project. This will help determine the best materials suited for durability and aesthetics.
2. Consider Material Properties: Each material has unique properties. For example, wood is great for beauty and strength, while metal is often chosen for its durability.
3. Think About the Environment: Opt for eco-friendly materials when possible, such as reclaimed wood or low-VOC paints. This reduces your carbon footprint and promotes sustainability.
4. Budgeting: Assess your budget before purchasing materials. High-quality materials might be pricier, but they often last longer, providing better value in the long run.
5. Weight and Size: Consider the weight and size of the materials. Heavier materials may require more support in your project.
6. Finish and Appearance: Choose materials that match your desired design style. Whether you want a modern look or a rustic feel, the right materials can enhance the overall aesthetics.
7. Availability: Ensure the materials you choose are readily available in your area. This prevents delays and potential complications during your project.
8. Research and Reviews: Look up reviews for specific materials. Feedback from others can help inform your choices and avoid potential pitfalls.
9. Consult Experts: Don’t hesitate to ask for advice from store staff or experienced DIYers. They can offer valuable insights and recommendations.
10. Test Materials: If applicable, do a small test with the materials before committing. This can help you confirm that they will work as expected in your project.
Transform your space with DIY projects
DIY home improvement projects can significantly enhance your living space, making it more functional and stylish.
By implementing the ideas discussed, such as painting, creative storage solutions, and selecting the right materials, you can transform your home without overspending.
Remember to plan adequately, gather your tools, and embrace your creativity.
Whether you’re a beginner or an experienced DIYer, there are always new skills to learn and projects to tackle.
Take your time, enjoy the process, and watch your home evolve into a space that reflects your personal style and needs.
